Showing posts with label Tot Spot. Show all posts

Monday, June 11

Red Roses: CSS Group Post


Happy Red Roses Day!  Clear & Simple Stamps is stopping to smell the roses today in honor of this fun holiday with projects featuring an array of floral sets from Collection 3.  I thought it would be fun to make a sweet baby card and combine the Flowers set with Special Bundle.

I love the Flowers set and find new ways to layer the blooms and grasses each time I use it.  I chose to pair the long stems with shorter grass and stamp in two shades of green for depth and interest.  The roses were stamped in bright red.  I also rolled the edges of a few of the medium blooms in a darker crimson to give the allusion of shading and variety.


To create a subtle sky I stamped a small strip from Hexagons Plus.  I didn't want it to be solid so I staggered the strips to taper off.  My stork was stamped onto Kraft Like a Rockstar and shaded with a white pencil.


For a finishing touch I stamped a quick label onto an envelope... a perfect touch for gift giving or delivering a bunch of red roses to the new momma.  ;)

The team is filled with rosie inspiration... head over to their blogs to see what's blooming:


All supplies are CSS unless noted.
Stamps: Flowers, Special Bundle, Hexagons Plus, Labels 9 (envelope)
Paper: Kraft Like A Rockstar (cream & original); SU! Riding Hood Red
Ink: PTI Pure Poppy, Scarlet Jewel, Simply Chartreuse, Spring Rain,  Dark Chocolate; SU! Always Artichoke
Tools: Ric Rac/Pinking dies, Special Bundle die-cuts

Tuesday, April 10

Sending Our Love


Have you noticed that more and more people are waiting to find out the sex of their baby until delivery day?  I personally don't have the patience for this... as a mother or as a card maker.  I mean really, a girl needs to prepare for these things! ;)  So, having a stash of "gender neutral" cards is a great idea (and maybe not just for babies).

Today, Clear and Simple Stamps, is showcasing a soft and natural color palette inspired by this photo:


I used the Baby Shower stamp set and coordinating die-cuts.  How cute is that alpha-print elephant?  Love him (or her). ;)

Join the design team for lots of "gender neutral" inspiration...

...you can find all their fabulous projects by visiting the CSS blog.


Stamps: CSS Baby Shower (elephant) and Cart Pals : Baby (sentiment)
Paper: MME; CSS Kraft Like a Rockstar (original & cream); SU! Soft Suede
Tools: CSS Tags 1 die-cuts; PTI double-ended banner and doily dies
Sassy Somethings: Prima trim, buttons

Wednesday, April 4

Milk & Cookies - CSS Party Hop

You can find my Play Date Cafe post HERE.

Welcome to a sweet celebration!  Today I'm partying with Clear & Simple Stamps for their Collection 2 Party Hop.  I chose to host a Milk & Cookies baby shower, and I am so excited to share the fun invitation and coordinating goodies with you.


A great party needs a fabulous invitation and the Party Elements : Baby stamp set is perfect for putting together a polished invite.  I created a long invitation and added a belly band with the cute cow from Sweet Dreams.  The curly frame is one of my favorite images from Party Elements : Baby and it also coordinates with the Mini Tri-Fold 1 die-cuts.


It's easy to whip up labels for individual milk bottles using adhesive sheets. The "Let's Celebrate" and "Thank You for Coming" are both from Party Elements : Baby... the set is packed with great sentiments that can take you from invitations to thank you notes.  My party favor is a bottle of Milk Duds and cookies wrapped in treat bags.

Tip: The Starbucks frappuccinos that you can buy at the grocery store are the perfect size for individual servings of milk at the shower and for packaging favors.  They are perfectly reminiscent of old-fashioned glass milk containers.


I wanted to share a few more Cookies & Milk party ideas... I really love this theme and hope you are inspired!
  • Create wraps for milk chocolate bars... use as cute decorations around your cookie bar and as favors.
  • Use "chalkboard" labels on your milk bottles for guests so they can label their drinks.
  • If any young children are attending the party, have a cookie decorating station to keep them busy and happy.
  • Hang cookie cutters from ribbon across the mantel or above the cookie bar for decoration.
  • Consider "Cookies in a Jar" from Bakerella.

Don't miss any of the fabulous party ideas that the Clear & Simple gals are sharing today.  
Here's a list for our Party Hop:

CSS Blog

Please Note: One of my projects is also featured on the 
CSS Daily App for iPhone and iPad users today, April 5th.


ALL Supplies are CSS unless otherwise noted.
Stamps - Party Elements : Baby, Sweet Dreams, Alpha Classic
Paper - On the Catwalk Cream & I'm a Princess Pink; My Mind's Eye - Paris & Co. 6x6
Tools: Mini Tri-Fold 1 die-cuts, Border : RicRac / Pinking die-cuts, Tags 1 die-cuts, MFT Fishtail Banner die-namics


Monday, March 12

Orange IS Fabulous


Hi-ya crafty friends!  I'm joining in with the Clear & Simple gals today to create with the color orange... known over at CSS as "Orange You Fabulous".  Did you know that CSS has a whole line of cardstock, buttons, ribbon, and accessories?  I love it when things coordinate.

Today I decided to make a card that also holds a gift card... perfect for a little something extra at a baby shower or for sending to a new mom.  To hold the gift card I trimmed down the Party Favor 1 die and used thin foam tape around the edges.  The shape reminds me of a gift bag.  Pulling the ribbon back a bit allows the gift card to slide out.


Please take note of the darling nursery rhyme text background from the Sweet Dreams set.  I adore it. This set is so original and sweet... one of my favorites from the Collection 2 release.

Orange for baby cards.  Who would have guessed?  It works and it's fresh...  I encourage you to try it too. For more fabulous orange inspiration, visit the Clear & Simple stamps DT:


Party Favor 1 (die cuts)

ALL Supplies are CSS unless otherwise noted.
Stamps: Sweet Dreams
Cardstock: Kraft Like a Rockstar (original) & cream, "Orange You Fabulous"; Patterned Paper: My Minds Eye (polka-dots), Crate Paper (argyle)
Tools: Favor It 1 (die cuts), PTI Limitless Labels 1-3/4"
Sassy Somethings: "Orange You Fabulous" buttons, PTI Orange Zest saddle stitch

Sunday, March 4

Special Bundle - Clear & Simple Stamps Release Day


A bouncing bunch of stamps and dies are arriving today in the Clear & Simple Stamps store.  This collection is full of fun background building sets, versatile dies, and lots of sweet baby related images.

My card uses the stork from Special Bundle.  I adore this set and am so excited to tell you that coordinating dies are also available in the store.  I opted to paper-piece the stork and used foam tape to "pop" his wings.


The gender neutral color scheme is a fresh take on yellow and green, and I really indulged in mixing patterns and prints for the card base.  The Build-a-Flower die is a great accent, and I love that you can choose how to build the layers and therefore also choose the size that works best with your project.


Thank you all for your kind comments and congratulations this week!  Visit the design team's blogs for more inspiration using the new products and then head over to Clear & Simple Stamps to shop.


Stamps: Special Bundle; Paper: PTI Harvest Gold, Ocean Tides, & CSS Kraft Like a Rockstar; My Mind's Eye - Miss Caroline - Fiddlesticks 6x6; Tools: Build-a-Flower dies, Spellbinders Basic Circles (lg.) & Basic Scallop Circles (lg.); Harvest Gold satin

Wednesday, February 29

Clear & Simple Stamps: Create-a-Plaid Preview

{This is the 1st of two posts for today. Please click here for my Play Date Cafe project.}


I have exciting news, dear friends: I am joining the Clear & Simple Stamps {App} design team!  This is cutting-edge technology for crafters and is available to iPhone & iPad users.  My projects will typically be peeked here on the blog, but CSS App users will have full content available.  Instructions, project photos, and LOTS of inspiration at the tip of your finger... whenever... wherever.  You can find out more about the App HERE.

More good news: It is release time at Clear & Simple Stamps!  Each release collection has a theme and March is swaddled in sweetness for all things BABY.  I will be participating along with the other DT members to preview these new sets and share inspiration.  Any sets that catch your eye will be available for purchase on March 5th.


Today the CSS team is highlighting the new background sets that are debuting this month.  I used Create-a-Plaid for a fashionable take on welcoming a little someone new.  I was inspired by classic Burberry plaid.  I used the wide strips for the bottom portion of the card and some of the thin lines to create a matching scarf for my giraffe.  Keep your eyes peeled for that sweet giraffe (and a few more animal friends) in coming days. ;)


I am thrilled to work with this company and their top-notch designers.  They have a store full of fabulous stamps, coordinating dies, cardstock, buttons, and ink... anything and everything your crafty heart desires.  I have been incredibly impressed with the quality of their products and packaging.  If you're new to Clear & Simple stamps, I encourage you to run over and check out the store... also be sure to visit the CSS blog each day for more March previews.

ALL Supplies are Clear & Simple Stamps unless otherwise noted.
Stamps: Create-a-Plaid & Baby Shower (available March 5th); Cardstock: Dare to be Diva Red, Perfect Little Black Dress, Kraft Like a Rockstar, and PTI Fine Linen; Tools: RicRac/Pinking die & Baby Shower dies, Spellbinders Class Ovals (lg.); Sassy Somethings: Dare to be Diva Red buttons, PTI Pure Poppy twill

Special Bundle - Play Date Cafe #121


Welcome to another beautiful Play Date Cafe challenge!  This is my 2nd post for the day... be sure to see this post about my opportunity to join the Clear & Simple Stamps design team and their March release.  It's a happy day at Sassy Stampin'!

Peony, Mojito, and Sand

The Cafe colors this week are pastels... some of my favorite shades of pink & green.  And since the March release at Clear & Simple stamps revolves around all things baby, I wanted to give you a peek at the new Special Bundle set.  One of my favorite features of this set is the ability to stamp a solid silhouette in one color and then add the outline image.  And how cute is that basket?


So, do this week's colors make you think baby?  Perhaps they remind you of spring, having tea with a girlfriend, or your favorite outdoor wedding... so many creative directions to go with these soft, sweet shades.  Play along with us in the Cafe for a chance to win a fabulous prize... we can't wait to see how these colors inspire YOU!

ALL Supplies are from Clear & Simple Stamps unless otherwise noted.
Stamps: Special Bundle (available March 5th); Cardstock: Kraft Like a Rockstar & I'm a Princess Pink; Patterned  Ink: A-Muse Studio Blush, SU! Soft Suede, Memento Tuxedo black; Tools: MFT Fish-tail Banner die-namics; & Simple Scallops die-namic, PTI Ric-Rac Border die (lg.) & Button Card die; Sassy Somethings: I'm a Princess Pink buttons and satin ribbon

Friday, August 12

Baby Banner - Pink Persimmon


It's "baby week" over on the Pink Persimmon blog this week and the Creative Team is sharing inspiration for all things baby.  Stop over and catch up on all the fun.

Confession?  I am obsessed with baby stamps.  I started buying them in bulk right after Joel and I got married... I couldn't wait to have babies!  Really, who doesn't love a sweet baby card?  My friends are starting to taper off on the baby making though and I am going to need some of you to volunteer to have more babies so that I can keep making cards for wee ones and their mommas.

For a twist, I didn't use Pink Persimmon's cute baby sets for this card but opted for the Large Banner set and Carnival Alphabet (small).  Vintage trims, twine, rolled flowers, and tea-dyed satin give it a shabby chic vibe.  I like that this card could really be translated for any occasion by changing the sentiment.


Stamps: Pink Persimmon - Large Banners, Carnival Alphabet (small); Cardstock: PTI Sweet Blush, Kraft, and Rustic Cream; Patterned Paper: The Girls Paperie; Sassy Somethings: Webster's Pages vintage trim, buttons, tea-dye satin ribbon

Thursday, February 24

Buttons, Bows, & Babies

Back in the groove. Back to the craft table. Back to buttons and bows. And back to babies... other people's babies. {smile} Did I mention, I've missed you... hello, sweet friends.

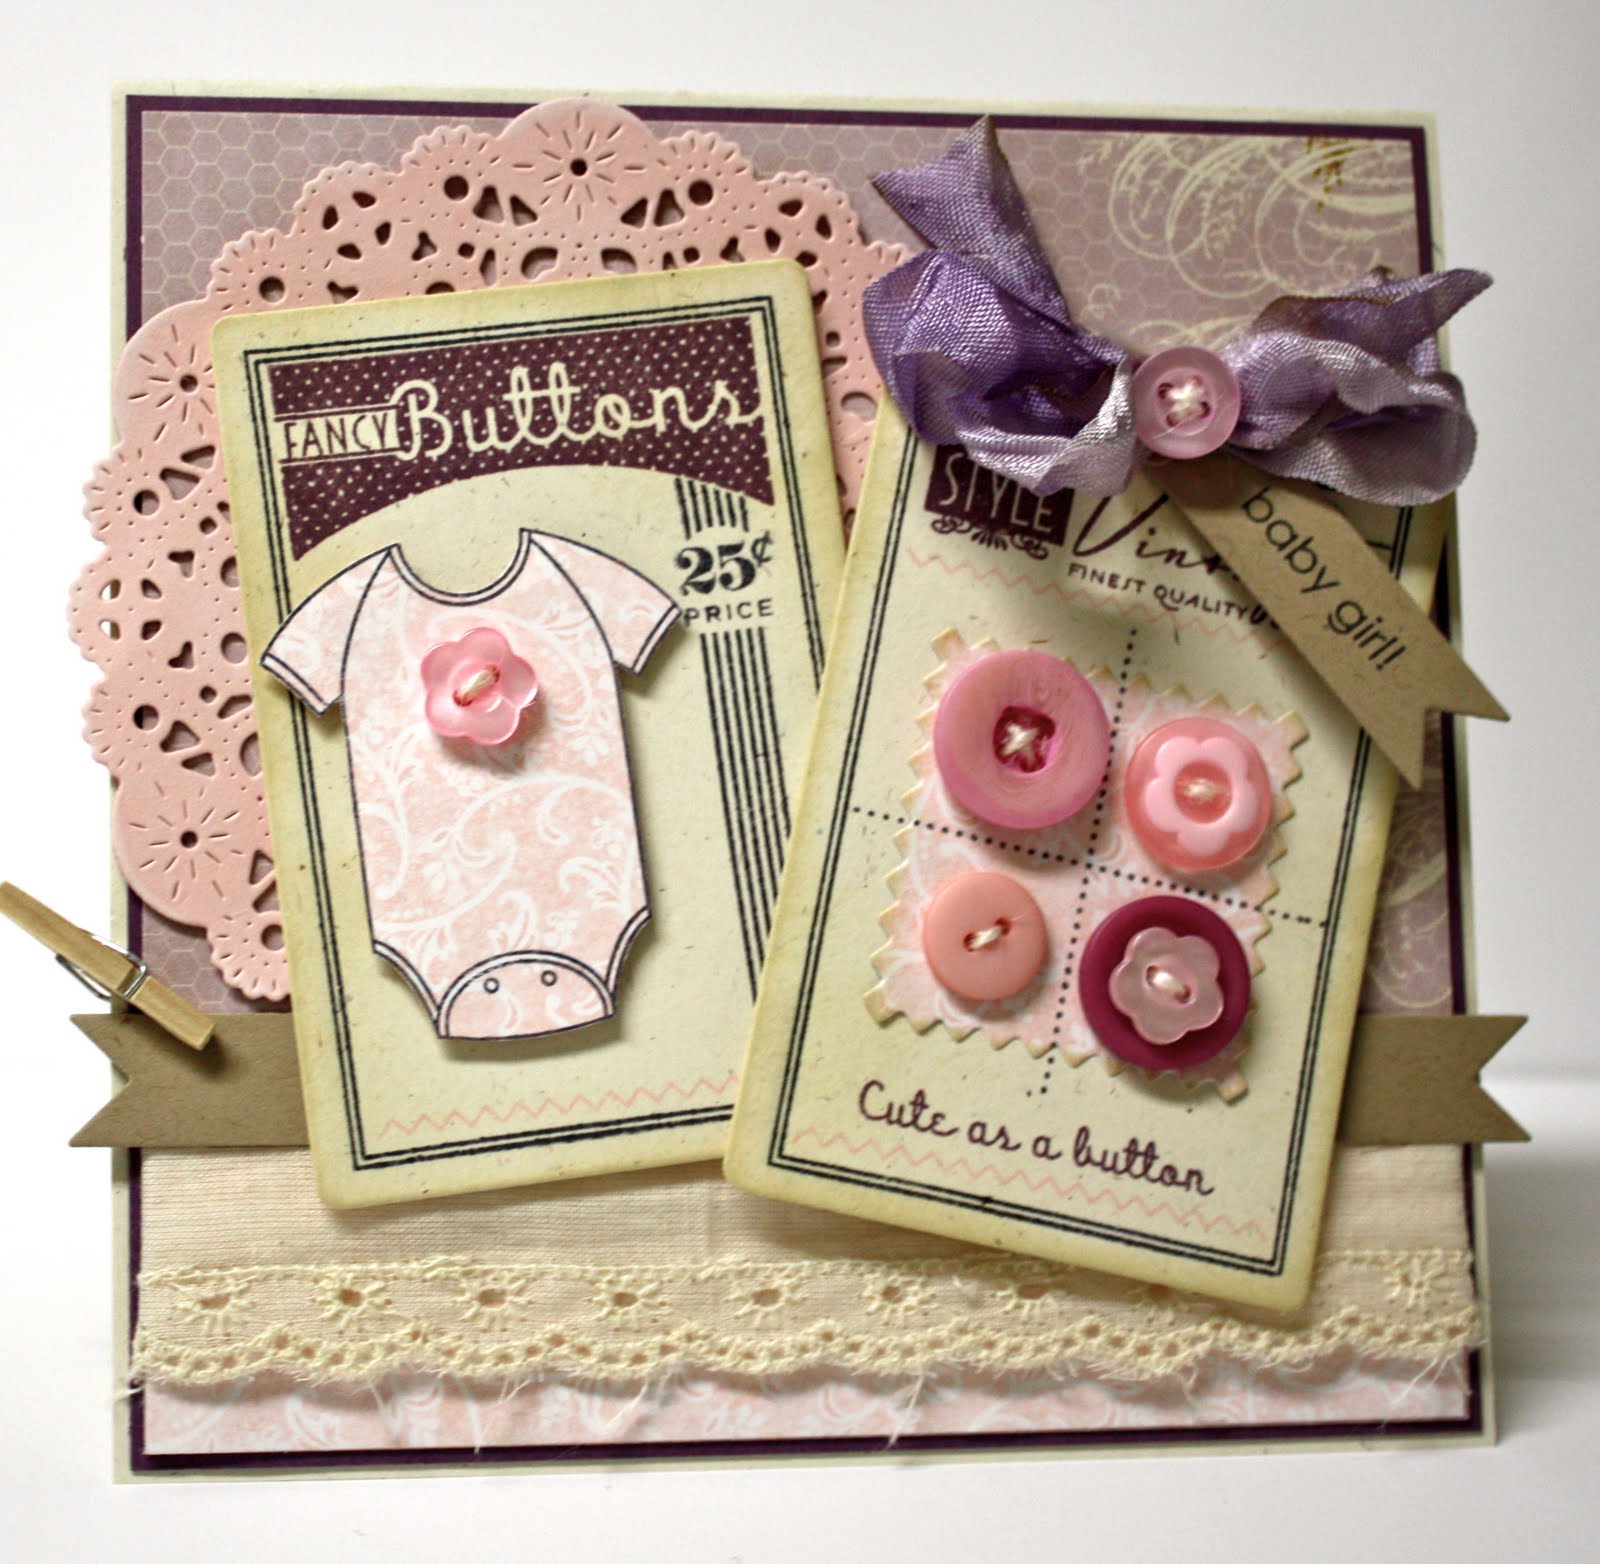
My dear, darling friend has the BEST style - vintage and fabulous. This card is reserved for her when her little dumpling arrives... full of Papertrey Ink's new Button Boutique and lots of little treasures.

Tip: I lightly sponged the edges of the Parisian doily with some white ink - something subtle that seems to add a little bit of authenticity.

I'm popping this into two of my favorite challenges...

Buttons and Bows {swoon}

and
A lovely color combination, as always.

All supplies are Papertrey Ink unless otherwise noted.
Stamps: Button Boutique, I&O Baby, Bitty Baby Blessings; Ink: SU Perfect Plum and Basic Grey; Paper: Rustic Cream, SU Perfect Plum and Pink Pirouette; Patterned Paper: Webster's Pages Hollywood Vogue; Tools: Parisian Lace Doily die, Button Card dies, Double-ended Banner dies; Sassy Somethings: Webster's Pages trim, Memrie Mare cabbage rose ribbon, buttons

Monday, November 15

Ahoy, Sailor.

A fun baby card for a bouncing baby boy. I love so many of the elements on this card but my favorite is probably the ric-rac waves. I've been trying to give a lot of thought to 'theme' lately - using less products and creating cohesiveness by repetition... I seem to get a cleaner result.

I've got a little stockpile of projects ready to share with you, and I'm looking forward to getting back into the swing of participating in challenges. Plus, we MUST have a Sassy Season of holiday goodies on the way, right? ;)

Stamps: PTI Bitty Baby Blessings, SU Woodgrain Background; Paper: SU Soft Suede, Crumb Cake, Pumpkin Pie, and Bashful Blue; PTI Rustic Cream and Distressed Dots; Tools: PTI Mat Stack 3 and Large Ric-Rac dies, 1 3/4 Circle Punch; Sassy Somethings: PTI Fine Linen Buttons and Orange Zest Topnotch Twill

Monday, October 5

BEAR-y Happy Birthday!

My daughter will be turning ONE in a few weeks and I want to share the party invitations I have been busy putting together using the new Build-A-Bear dies. SO stinkin' CUTE... and easy!

Granted, it has taken time to run all the pieces thru. my Big Shot, but with the BIGZ dies I can run two layers of card stock thru. at a time - i.e. half as many cranks of the handle. TIP: I can't keep track of the tiny eyes, nose, and mouth. I used my 1" Circle Punch with Chocolate Chip card stock and adhered it to the back of the bear's head - voila! I Build-my-Bears in front if the TV at night - snuggled up next to my hubs.
My darling bear is holding 2 party necessities: A balloon created using the Crazy for Cupcakes set and a yummy cupcake borrowed from Sock Monkey. I used my Chocolate Chip Stampin' Write Marker and handy Stamp-a-ma-jig to isolate the balloon's string and perfectly place it on my card base. I dressed it up a bit using a hot pink button from my stash. And because my dear daughter is so SASSY - a few rhinestones on the hair bow and shirt seemed like perfect touches.

BLOG CANDY: Would you like to play with a few Build-A-Bear die cuts yourself? I'll run some bear bodies and cute outfits thru. my machine (including the Christmas outfits - I know you love me!) and send them to one lucky reader. Leave a comment by Wednesday at midnight to be entered to win! ;)

Check out the Deal of the Week. 3 great punches on sale thru. October 11th.

A Sassy Stampin' exclusive promotion: Purchase My Digital Studio and receive a $15 Stampin' Up! Gift Certificate! CLICK HERE for more details.

Sassy Stampers:
SHOP ONLINE 24/7

Stamps: Crazy for Cupcakes (111618), Sock Monkey (111552)
Paper: Pretty in Pink (100459), Certainly Celery (105125), Brocade Blue (101166), Rose Red (102544), Creamy Caramel (102514), Chocolate Chip (102128)
Ink: Chocolate Chip (100908), Choc. Chip Stampin' Write Marker (100071)
Tools: 1" Circle Punch (109046), Stamp-a-ma-jig (101049)
Big Shot (113439): Build-A-Bear BIGZ Die (117977), Beary Essentials BIGZ Die (117978), Beary Girl Sizzlit (117982),Top Note Die (113463), Swiss Dots Embossing Folder
Sassy Somethings (from the stash): Pink Button, Rhinestones

Thursday, August 20

Back to School Treats

Are you ready for Back to School? Today, I have a super sassy and fun idea for lunch box treats, sweet teacher goodies, after-school snacks, or quick and easy party favors.

Using the French Fry Favor Template from Creating Keepsakes I made these simple and sassy treats. CLICK HERE to download the template. It prints 2 to a page and is a snap to assemble. To make favors like mine you only need a few supplies:
  • Simply Scrappin' Sunny Day (115700)
  • On Board So Tweet Chipboard (113893)
  • Scallop Circle Punch (109043)
  • Sticky Strip (104294) and Mini Glue Dots (103683)
A few tips and tricks:
  • Cut 12" x 12" paper down to 8.5" x 11".
  • Be sure to print on the 'wrong' side of your Designer Series Paper. Of course, with Stampin' Up's fabulous reversible patterned paper - there is no 'wrong' side! ;)
  • After trimming and scoring use Sticky Strip to adhere the box. Important: front flap goes on top of back flap.
  • You can use ribbon around the boxes or the border strip stickers that come as part of the Simply Scrappin' kit.
  • On Board So Tweet Chipboard perfectly coordinates with the stickers from Simply Scrappin' Sunny Day... covering chipboard couldn't be easier than 'peel and stick'.
I added a 2" x 2" mini card to this Fry Favor. I simply punched a hole and tied it on with ribbon. Perfect for a quick 'thank you' or sweet sentiment.

I'd love to see your Fry Favors! Whip a few up and share your link at Pals Paper Arts. This week we're hosting an Anything BUT A Card Challenge -- perfect for all kinds of fun treats! Or share something new -- we LOVE to see what YOU create!


Thursday, August 13

Monkey Business - PPA3


This week Pals Paper Arts is hosting a Picture Perfect Inspiration Challenge. I love the playroom photo from Pottery Barn Kids and noticed a silly monkey on the shelf -- he is my inspiration. Because who doesn't love a little Monkey Business? (To view the full photo visit: Pals Paper Arts.)
  • My cards base is a 5.5" x 11" piece of Kraft card stock scored in half. A textured layer of Ruby Red is cut to 5" square and tops the base.
  • All of the patterned paper and tags are from The Write Stuff Specialty Designer Series Paper collection. The colors included in Write Stuff are: Crushed Curry, Soft Suede, Ruby Red, and Old Olive. Today's sassy somethings: the die cut tags. The assortment is great, plus, they are perfect for quick embellishments, journaling for scrapbook pages, or creating card layers.
  • Two small polka-dot prints in Soft Suede and Old Olive provide the background. A strip of Chocolate Chip felt ribbon hides the 'seam' and provides the perfect amount of texture. (The softness reminded me of a stuffed animal.)
  • I grabbed the Sock Monkey set and stamped Mr. Monkey 3 times in Chocolate Chip onto: Very Vanilla, Kraft, and Ruby Red. To add some 'nubby' texture to him, I zipped the Kraft image through my Big Shot with the Cuttlebug Swiss Dots embossing folder. TIP: The Sock Monkey set is part of this month's Stampin' Up! promotion. With any $35 in purchases from the Growing Up section of the catalog you earn FREE buttons! Click here for more details.
  • Using my Paper Snips (ideal for precision cutting) I paper pieced Mr. Monkey. A few Stampin' Dimensionals make him 'pop' from the flower tag.
  • The banana is stamped 3 times onto So Saffron and trimmed. Mr. Monkey holds one while the other two are 'framed' in quick circles along the bottom 'border'. I used my 1.25" and 1" Circle Punches for perfect layering. TIP: An additional set of Sock Monkey Accessories are available to be sure you have every occasion covered. (111552 - $21.95)
  • I love the 'punny' sentiment, "Thanks a bunch'. I stamped it onto Old Olive then punched it with the Round Tab Punch. A tidy bow (complete with sassy Playground Button) ties everything together.
Don't miss the Growing Up promotion.
Order Online ANYtime!

Stamps: Sock Monkey (111552)
Paper: Kraft (102125), Ruby Red (102030), Old Olive (100702), The Write Stuff Specialty Designer Series (115674)
Ink: Chocolate Chip (100908)
Tools: Circle Punches - 1.25" (104403), 1" (109046), Round Tab Punch (108340), Big Shot Machine (113439), Cuttlebug Embossing Folder - Swiss Dots
Must-Haves: Paper Snips (103579), Stampin' Dimensionals (104430)
Sassy Somethings: Playground Buttons (116313), Chocolate Chip Felt Ribbon (retired)