Monday, August 31

Ribbon Ruffles

Ready, set, run for your ribbon! This week we're going to learn some simple and sassy ways to dress up any project with ribbon. Today: Ruffles with Double-Stitched Ribbon.

When I learned this technique on Lisa Johnson's Poppy Paperie blog I was head over heels. I am so excited to re-create her tutorial using Stampin' Up! ribbon and supplies and to share it with you. I love the gathered look that this ribbon trick gives projects... it has a homespun feel that is just perfect for a special touch. Here's how to add this scrunched sweetness to your next project:

Start with a longer piece than you think you'll need - you 'lose' length from scrunching. For example: on my 4" square card, I started with a 16" piece of Rose Red Double-Stitched. Next, lift out the thread from ONE side of the ribbon. TIP: I do this on BOTH ends. Then, pulling the thread, I scrunch gently towards the middle.

Use Sticky Strip to adhere the ruffle to your card base. Wrap the ends, trim your excess, and tape the 'hangover' down. TIP: You want to be sure that you pull the thread out and secure it -- preventing the ruffle from unraveling. I used Sticky Strip again -- making it easy to peel the backing and adhere to my card base. You can also use something as simple as Scotch tape to make those ends stay put.


I made two cards to showcase this technique... both lovey-dovey themed. I was inspired by blog reader, Nadine, to create a few wedding cards. She specified that brown was not only her favorite color, but also part of the wedding's colors. I added the pinks... one of my favorite combinations. (and also the colors of my own wedding ;)
The large card (5" x 7") is inspired by Card Patterns Sketch 30 and has a bit of a vintage flair with Kraft card stock and distressed edges. The heart from Always was a perfect fit paired with the happiness sentiment from Heard From the Heart.
The smaller card (4" square) uses Thoroughly Modern Designer Series Paper and Eight Great Greetings stamp set. It's simple and straight forward - the Rose Red Double-Stitched ruffle really is the showstopper.

Tomorrow:
The Holiday Mini Catalog goes 'live'.
I'll have an exclusive Ribbon Promotion to go along with it.

Stamps: Always (113620), Heard From the Heart (111644), En Francais (109521), Eight Great Greetings (113822)
Paper: Chocolate Chip (102128). Kraft (102125), Rose Red (102544), Pretty in Pink(100459), Bella Bleu Designer Series (113974), Thoroughly Modern Designer Series (115673)
Ink: Chocolate Chip (100908), Ranger Tea Dye Distress Ink
Tools: 3/16" Corner Rounder (109047)
Must Haves: Sticky Strip (104294)
Sassy Somethings: Chocolate Chip Double-Stitched (111849), Rose Red Double-Stitched (111846), Sherbet Buttons (116312), Button Latte (114333), Chocolate Chip Corduroy Buttons (114339)

Sunday, August 30

A Wonderful Week

Hi friends! I wanted to give you a little advance notice that this week is going to be special at Sassy Stampin'... you won't want to miss out!
  • I plan to highlight some fabulous tips and tricks using one of my favorite supplies/embellishments throughout the week. (No, not buttons! ;) You'll love the quick tutorials and sassy ideas.
  • The Holiday Mini Catalog goes live on Tuesday and it is FABULOUS! I'll be running a sassy promotion in conjunction with its debut... freebies are SO sassy!
  • Wednesday has a special surprise is store and will be a perfect opportunity for you to show off your Sassy Stampin' Style.
  • Pals Paper Arts is always fun and fresh for Thursday. Join us for a Color Challenge... be inspired and play along!
  • The weekend will be sweet with Blog Candy and sassy treats!
See you here tomorrow for a week of
Sassy Somethings!

Thursday, August 27

Pumpkin Patch

Are you excited about the Stampin' Up! Holiday Mini? It debuts on September 1st and is filled to the brim with adorable holiday stamp sets and accessories. One of my favorite fall sets from the Holiday Mini is Pumpkin Patch - a perfect fit for this week's Halloween Challenge at Pals Paper Arts. The pumpkins are totally customizable and are extremely versatile - ideal for Halloween as well as fall/Thanksgiving projects.
  • My card base is a 10" x 7" piece of Kraft card stock scored in half and topped with 2 layers: Dusty Durango and Chocolate Chip.
  • Two delightful (and a bit vintage) patterns create the background. The polka-dots are from Crushed Curry Patterns while the luxe hounds tooth is from Autumn Meadows Designer Series collection. (available Sept. 1st)
  • Chocolate Chip Double-Stitch ribbon hides the seam where the 2 prints meet and is finished with a bow and festive button. The sentiment, 'from our patch to yours -- happy halloween!' hangs from a hand-cut 'tag'.
  • The pumpkin panel was created using a Stamp-a-ma-jig. I stamped the oval pumpkins directly onto Very Vanilla in Pumpkin Pie ink. My round pumpkins were stamped separately in Dusty Durango and punched using my 1" Circle Punch. TIP: The 1" Circle Punch or 1.25" Circle Punch both work perfectly - the 1.25" leaves a bit of a rim around the pumpkin.
  • Some spooky faces give my pumpkins personality (the set has 3 choices) and the round pumpkins were 'popped' using Stampin' Dimensionals. A quick Old Olive matte with a Kraft Scallop Edge completes this card - no tricks here, just treats!
Play along with me at Pals Paper Arts this week! We're getting ready for all things spooky with a Halloween challenge! Can't wait to see what you create...

Need a Holiday Mini catalog?
E-mail me for your FREE catalog - I'll pop it in the mail today!

Order your stampin' treats online anytime.
Shop Stampin' Up!


Stamps: Pumpkin Patch (available September 1st)
Paper: Kraft (102125), Dusty Durango (115321), Chocolate Chip (102128), Old Olive (100702), Very Vanilla (101650), Crushed Curry Patterns (115686), Autumn Meadows Designer Series (available September 1st)
Ink: Pumpkin Pie (105216), Dusty Durango (115654), Chocolate Chip (100908)
Tools: Stamp-a-ma-jig (101049), Scallop Edge Punch (112091)
Sassy Somethings: Chocolate Chip Double-Stitch (111849), Linen Thread (104199), Button - New Leaf (Papertrey Ink)

Tuesday, August 25

Simple and Sweet

Just a quick post today with a simple card. I decided to have a Papertrey Ink kind-of day and use my new Everyday Button Bits stamp set. Did anyone really doubt I would be able to pass this up -- ya know, with my button obsession and all?!

I combined a few challenges for this sweet creation:
The details:
  • My Very Vanilla card base measure 5.5" square and is topped with layers of PTI Spring Moss and Everyday Blessings prints.
  • A piece of retired Stampin' Up! Ginger Blossom Designer Series Paper in Groovy Guava was zipped thru. the Big Shot using my Top Note die.
  • Two scallop squares (Marvy purple and green) frame my sassy cherries - made from PTI Hibiscus Burst buttons and tied with SU! Linen Thread.
  • Spring Moss Grosgrain is tied off with a coordinating button for a special touch, while Groovy Guava scallops peek out from the right edge.
  • Last, but not least, a sweet sentiment... because this spring-y card is definitely sweet!
Enjoy your day!
I look forward to seeing you Thursday at Pals Paper Arts
for a Halloween Challenge!

Monday, August 24

Classy Canary

Need a chic card for a sassy friend? Look no further than the Chic Boutique stamp set. The images are the perfect mix of chic, sassy, and even a little bit vintage.
  • My Kraft card base is 7" x 10" - scored in half... layered with Ruby Red and Old Olive. My Old Olive layer is punched with the Scallop Edge Punch and pierced using the Paper Piercing Tool.
  • Very Vanilla textured card stock is stamped with the damask image from Friends 24-7. I alternated the rows in Ruby Red and Baja Breeze. A Stamp-a-ma-jig is a must! TIP: I typically stamp an entire 12" x 12" piece of card stock when creating my backgrounds. This allows me to trim the best section as well as have a centered image. Plus, the 'scraps' always find their way to other projects. CLICK HERE to see an example of a 'scrappy' project.
  • I stamped my classy canary onto Watercolor Paper in StazOn ink. I used Blender Pens dipped in Creamy Caramel, Baja Breeze, and Ruby Red to shade the cage and 'tweet' friend.
  • A piece of Old Olive receives the Scallop Edge treatment. To create the cage's stand I used the ornament string from Tree Trimmings. (Not to toot my own horn, but I did feel pretty smart when I thought of this! ;) I trimmed my cage and 'popped' it onto the stand using Stampin' Dimensionals. A sassy button was added for the cage's handle.
  • Old Olive sits atop 2 layers of Ruby Red and Baja Breeze .This entire 'panel' is popped with Stampin' Dimensionals onto Kraft.
  • The 'hello' sentiment from Chic Boutique is stamped inside of a swirly frame from Frames with Flourish. TIP: The 2009-10 Idea Book and Catalog has a NEW and updated version: Framed with Love.
Sassy Stampers:
Order Online 24-7!

Stamps: Chic Boutique (113744), Friends 24-7 (113218), Tree Trimmings (116722), Framed with Love (114389)
Paper: Kraft (102125), Ruby Red (102030), Old Olive (100702), Very Vanilla - textured 12 x 12 astd. (108693), Baja Breeze* (retired), Watercolor (105019)
Ink: StazOn (101406), Ruby Red (102259), Baja Breeze* (retired), Creamy Caramel (103220)
Tools: Scallop Edge Punch (112091), Paper Piercing Tool (116631) and Mat Pack (105826), Stamp-a-ma-jig (101049)
Must Haves: Blender Pens (102845), Stampin' Dimensionals (104430)

* A wonderful substitute for Baja Breeze is Bordering Blue. (Classic Stampin' Pad (102265) and Card stock (102630))


Saturday, August 22

Join Me - Get a Treat

Join Stampin' Up! Right now we're offering a Mini Starter Kit - with a mini price! Act fast - this special offer ends August 31st. Here's what's included in the Mini Starter Kit:
  • In Color Assorted Card Stock 8.5" x 11"
  • Whisper White Card Stock 8.5" x 11"
  • In Color Classic Stampin' Pads (6)
  • For All You Do Stamp Set
  • Business Forms and Tools
As a treat from me, a full set of:
In Color Stampin' Write Markers.

The standard Starter Kit ($199) also has a special bonus thru. August 31st. You'll get all the 'regular' supplies PLUS a set of 6 In Color Classic Stampin' Pads. (a $43 value) And of course, the In Color Stampin' Write Markers from me. CLICK HERE to view more details on the Starter Kit.

Benefits of being a demonstrator:
  • Free Shipping on Starter Kits.
  • 30% OFF – Your first demonstrator order (within 45 days, $150 order minimum) You'll also get to take advantage of Hostess Benefits and any current promotions.
  • No obligation – Remain active and continue to take advantage of 20% instant income/discount. If you choose to not remain active you keep all the starter kit goodies. (TIP: Purchasing the starter kit can be a BETTER deal then buying the items individually.)
  • 20% profit/discount on every sale/purchase.
  • Pre-order - If you're anything like me you love to have the latest and greatest. As a demonstrator you have the opportunity to purchase new supplies and stamps before the general public. In addition, Stampin' Up! currently offers demos an EXTRA 20% off these pre-order items. WOW!
  • Access to an exclusive website where some of the best in the Stampin' Up! business discuss products, participate in challenges, and encourage one another personally and professionally.
  • The price is RIGHT - only $85 when you join during the month of August and take advantage of the Mini Starter Kit.
Don't you just love a good treat? The small things in life really are the most cherished. And that my friends is why I became a Stampin' Up! demonstrator. I cherish creating for others - of putting time, effort, and detail into projects that show others how much I cherish them. Stampin' Up! products make my time more productive - organized perfectly into color families with coordinating papers, embellishments, and stamps. Plus, high quality is a MUST and I feel strongly that Stampin' Up! always provides a superior product. And let's be honest, I LOVE a good discount.

I would love for you to join me!
Sassy Stampers CLICK HERE to sign up as a demonstrator.
Password: sassystampin

I'm always available for questions: CLICK HERE to e-mail me.

Thursday, August 20

Christmas in August

I didn't think I was ready to get into 'Christmas mode', but this card has completely changed my mind! I'm ready to deck the halls and trim the tree! While those things may be a bit premature, I can definitely get a head start on Christmas cards. Today's card is inspired by 3 challenges:
ALL of these sites host fun and unique challenges each week - be sure to check them out for inspiration and project ideas!

The measurements for my card layers (from bottom to top):
  • Soft Suede card base 5.5" x 11" - scored in half.
  • Sneak Peek: Christmas Cocoa Specialty Designer Series Paper - 5.25" square.
  • Kiwi Kiss (retired Bella Rose Designer Series Paper) 4.75" square. TIP: Old Olive or Mellow Moss would be perfect 'subs' for this color combination.
  • A 4.25" square of Soft Suede got zipped through the Big Shot using the Finial Press Embossing Folder.
  • Whisper White textured card stock trimmed to 3.5" square. (Rounded corners compliments of my 3/16" Corner Rounder.)
More Details:
  • I used my handy Stamp-a-ma-jig to place the Ornaments. TIP: By using Grid Paper I was able to make sure they were evenly spaced. In addition, I lined up the 'string' stamp with the grid lines to be sure they were stamped straight.
  • The Soft Suede ornament was stamped twice - once on the Whisper White base layer, and again on a separate sheet to be trimmed and 'popped' using Stampin' Dimensionals.
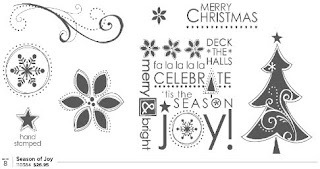
  • My sentiment was created using stamps from Season of Joy. First, I stamped the swirl image in Kiwi Kiss. Next, using my Stamp-a-ma-jig, I added 'Merry Christmas' on top. The image was quickly punched using the Wide Oval Punch... one of my favorites!
NEW Christmas Products and a whole lot more....
September 1st - Holiday Mini!
Need a Holiday Mini catalog sent to you?
E-mail me your address and I'll pop it in the mail!

Stamps: Tree Trimmings (116722), Season of Joy (110384)
Paper: Soft Suede (115318), Whisper White - 12 x 12 Textured Neutrals - astd. (108693), Christmas Cocoa Specialty Designer Series (available September 1st) Bella Rose Designer Series (retired)
Ink: Soft Suede (115657), Kiwi Kiss (retired)
Tools: Big Shot Machine (113439), Finial Press Embossing Folder (115963), 3/16" Corner Rounder (109047), Wide Oval Punch (112082), Scallop Oval Punch - Marvy (pink)
Must-Haves: Stamp-a-ma-jig (101049), Grid Paper (102787), Stampin' Dimensionals (104430)
Sassy Somethings: Soft Suede Polka-dot Ribbon (115612), K&Co. Snowflake Brads


Back to School Treats

Are you ready for Back to School? Today, I have a super sassy and fun idea for lunch box treats, sweet teacher goodies, after-school snacks, or quick and easy party favors.

Using the French Fry Favor Template from Creating Keepsakes I made these simple and sassy treats. CLICK HERE to download the template. It prints 2 to a page and is a snap to assemble. To make favors like mine you only need a few supplies:
  • Simply Scrappin' Sunny Day (115700)
  • On Board So Tweet Chipboard (113893)
  • Scallop Circle Punch (109043)
  • Sticky Strip (104294) and Mini Glue Dots (103683)
A few tips and tricks:
  • Cut 12" x 12" paper down to 8.5" x 11".
  • Be sure to print on the 'wrong' side of your Designer Series Paper. Of course, with Stampin' Up's fabulous reversible patterned paper - there is no 'wrong' side! ;)
  • After trimming and scoring use Sticky Strip to adhere the box. Important: front flap goes on top of back flap.
  • You can use ribbon around the boxes or the border strip stickers that come as part of the Simply Scrappin' kit.
  • On Board So Tweet Chipboard perfectly coordinates with the stickers from Simply Scrappin' Sunny Day... covering chipboard couldn't be easier than 'peel and stick'.
I added a 2" x 2" mini card to this Fry Favor. I simply punched a hole and tied it on with ribbon. Perfect for a quick 'thank you' or sweet sentiment.

I'd love to see your Fry Favors! Whip a few up and share your link at Pals Paper Arts. This week we're hosting an Anything BUT A Card Challenge -- perfect for all kinds of fun treats! Or share something new -- we LOVE to see what YOU create!


Friday, August 14

Fall Duo

I have volunteered to hostess 'Turkey Day' this year -- my first ever in my home. I already know that I will want all the details to be perfect. I want to make each guest a small greeting card for their seat at the table - a little 'welcome' to let them know how thankful we are they could join us. The NEW Autumn Splendor stamp set paired with the NEW Autumn Meadows Designer Series Paper are perfect for fall projects. (Available September 1st in the Holiday Mini Catalog.)

Each card is 4" x 4" and are inspired by the picture and challenge this week at Our Creative Corner. Autumn Meadows Designer Series seemed like the perfect 'match'. This paper is luxurious and rich in Really Rust, More Mustard, Chocolate Chip, Very Vanilla, and Taken with Teal. It has a shabby chic vibe and is beautifully rustic.
  • My first card is created using a More Mustard base with a layer of Taken with Teal. The corners are rounded at the opening flap.
  • A layer of graphic print from Autumn Meadows provides the background. I topped the background layer with a large leaf image trimmed from the Designer Series Paper.
  • Using my Linen Thread (I LOVE this stuff) I strung a few buttons from my favorite two collections: Button Latte and Playground Buttons. The thread is wrapped around the Taken with Teal layer - buttons 'stay put' with help from Mini Glue Dots.
  • The sentiment is from the retired set Give Thanks. It is stamped in Chocolate Chip onto More Mustard and matted with Chocolate. The entire piece is mounted on Stampin' Dimensionals.
  • My leaf from Autumn Splendor was stamped in Chocolate Chip directly onto a piece of Autumn Meadows Designer Series Paper and trimmed. The images included in Autumn Splendor are extremely versatile - perfect for water coloring, paper piecing, or embossing. I popped it onto Stampin' Dimensionals and added it to the corner.
  • My second card base is Really Rust. I cut a 3.75" square piece of More Mustard and layered it with a subtle print in Taken with Teal.
  • Using my Scallop Circle #2 Bigz Die I zipped a wood-grain print through the Big Shot. TIP: Wood-grain is SO sassy and a VERY big trend in crafting right now. I adhered the large scalloped circle directly onto my Taken with Teal background.
  • Chocolate Chip Striped Grosgrain wraps around the More Mustard layer.
  • The centerpiece of this little delight is made from Stampin' Up!s NEW Wood Sheets... today's sassy something. I dipped one of the leaves in StazOn ink and stamped directly onto the Wood Sheet. TIP: Try heat setting to be sure your image stays free of smudges.
  • I punched the image off center using my 1.75" Circle Punch. I mounted the image onto 2 scallop circles - Taken with Teal and Really Rust. TIP: The Scallop Circle Punch is not big enough for providing a background layer with 1.75" images. However, the Scallop Circle #2 Bigz Die is perfect.
  • Three buttons are added to fill the empty space and provide a little 'bling'.
  • The 'for you' sentiment is from Great Friend and is 'popped' using Stampin Dimensionals. A few Vintage Brads are a delightful accent.
  • The entire panel of More Mustard is popped with Stampin' Dimensionals before adding it the the Really Rust card base.
Before Thanksgiving rolls around I hope to have a card made for each place setting. Of course, there will be other treats in store as well. I look forward to sharing my ideas for entertaining and crafting as the holiday season rolls around.

Need a Holiday Mini Catalog?
E-mail me - I'll pop one in the mail for you.
Before you know it you'll be dreaming up and creating
sassy holiday projects too.

Stamps: Autumn Splendor (available September 1st), Great Friend (113792), Give Thanks (retired)
Paper: Really Rust (100661), More Mustard (100946), Taken with Teal (105122), Autumn Meadows Designer Series (available September 1st)
Ink: Chocolate Chip (100908), StazOn (101406)
Tools: 1.75" Circle Punch (112004), Scallop Circle #2 BIgz Die (113468), 3/16" Corner Rounder (109047)
Must-Haves: Stampin' Dimensionals (104430), Mini Glue Dots (103683)
Sassy Somethings: Wood Sheets (116309), Button Latte (114333), Playground Buttons (116313), Linen Thread (104199), Vintage Brads (109109), Chocolate Chip 1.25" Striped Grosgrain (115617)


Thursday, August 13

Monkey Business - PPA3


This week Pals Paper Arts is hosting a Picture Perfect Inspiration Challenge. I love the playroom photo from Pottery Barn Kids and noticed a silly monkey on the shelf -- he is my inspiration. Because who doesn't love a little Monkey Business? (To view the full photo visit: Pals Paper Arts.)
  • My cards base is a 5.5" x 11" piece of Kraft card stock scored in half. A textured layer of Ruby Red is cut to 5" square and tops the base.
  • All of the patterned paper and tags are from The Write Stuff Specialty Designer Series Paper collection. The colors included in Write Stuff are: Crushed Curry, Soft Suede, Ruby Red, and Old Olive. Today's sassy somethings: the die cut tags. The assortment is great, plus, they are perfect for quick embellishments, journaling for scrapbook pages, or creating card layers.
  • Two small polka-dot prints in Soft Suede and Old Olive provide the background. A strip of Chocolate Chip felt ribbon hides the 'seam' and provides the perfect amount of texture. (The softness reminded me of a stuffed animal.)
  • I grabbed the Sock Monkey set and stamped Mr. Monkey 3 times in Chocolate Chip onto: Very Vanilla, Kraft, and Ruby Red. To add some 'nubby' texture to him, I zipped the Kraft image through my Big Shot with the Cuttlebug Swiss Dots embossing folder. TIP: The Sock Monkey set is part of this month's Stampin' Up! promotion. With any $35 in purchases from the Growing Up section of the catalog you earn FREE buttons! Click here for more details.
  • Using my Paper Snips (ideal for precision cutting) I paper pieced Mr. Monkey. A few Stampin' Dimensionals make him 'pop' from the flower tag.
  • The banana is stamped 3 times onto So Saffron and trimmed. Mr. Monkey holds one while the other two are 'framed' in quick circles along the bottom 'border'. I used my 1.25" and 1" Circle Punches for perfect layering. TIP: An additional set of Sock Monkey Accessories are available to be sure you have every occasion covered. (111552 - $21.95)
  • I love the 'punny' sentiment, "Thanks a bunch'. I stamped it onto Old Olive then punched it with the Round Tab Punch. A tidy bow (complete with sassy Playground Button) ties everything together.
Don't miss the Growing Up promotion.
Order Online ANYtime!

Stamps: Sock Monkey (111552)
Paper: Kraft (102125), Ruby Red (102030), Old Olive (100702), The Write Stuff Specialty Designer Series (115674)
Ink: Chocolate Chip (100908)
Tools: Circle Punches - 1.25" (104403), 1" (109046), Round Tab Punch (108340), Big Shot Machine (113439), Cuttlebug Embossing Folder - Swiss Dots
Must-Haves: Paper Snips (103579), Stampin' Dimensionals (104430)
Sassy Somethings: Playground Buttons (116313), Chocolate Chip Felt Ribbon (retired)

Wednesday, August 12

Scraps n' Squirrels

I'm not sure that I ever thought the word 'squirrels' would be included as part of my post title but today's project is Simple, Sassy, and a little bit 'squirrely'.
  • I always have paper scraps that I save (hoard??) so I thought it would be fun to do a quick card using a few scraps from 'the stash'. My Pumpkin Pie card base is standard size and layered with Chocolate Chip.
  • Using scraps from Kraft Patterns, Always Designer Series, and Delicate Dots Designer Series Paper packs, I trimmed varying widths and patterns to cover my Chocolate layer. One of layers even received a few quick punches with the Scallop Edge Punch.
  • For a little extra sass I also tied on some ribbon: Bashful Blue Striped Grosgrain and So Saffron Grosgrain. A bow with Playground Button center is a fun touch. TIP: During the month of August you can earn FREE Buttons with any $35 purchase from the Growing Up section of the catalog. Click here for more details.
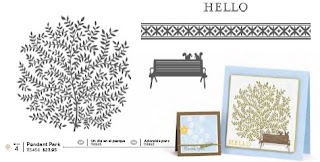
  • Today's featured sassy somethings: punches. I was thrilled to figure out that the bench with squirrels image from Pendant Park is perfectly suited for the Wide Oval Punch. I stamped the bench in Chocolate Chip onto Kraft and popped it right out - easy! For added emphasis I used my Marvy scalloped oval (pink).
  • The simple 'Hello' sentiment was punched using the NEW Modern Label Punch. A couple of Vintage Brads accent the sides.
A new Inspiration Challenge will be posted at
Pals Paper Arts tomorrow.
Hope you'll join us!

Stamps: Pendant Park (115456)
Paper: Pumpkin Pie (105117), Chocolate Chip (102128), Kraft (102125), Kraft Patterns (retired), Delicate Dots (retired - SAB 2009), Always (retired)
Ink: Chocolate Chip (100908)
Tools: Wide Oval Punch (112082), Modern Label Punch (116630), Scallop Edge Punch (112091), Marvy Scalloped Oval Punch (pink)
Sassy Somethings: Bashful Blue Striped Grosgrain (110717), So Saffron Grosgrain (currently available in stripe - 113699), Playground Buttons (116313), Vintage Brads (109109)

Thursday, August 6

Chic in Purple

Hello friends! Pals Paper Arts is hosting a Simple Sketch challenge this week. The sketch is fabulous and clean - perfect for dressing up or down. And speaking of dressing up... my card uses the dress form image from Chic Boutique.
  • A Rich Razzleberry standard card base is layered with Melon Mambo and a swirly print (4" x 4.5") from Razzleberry Lemonade Designer Series Paper collection. Stampin' Up! Designer Series Paper is printed on both side - the reverse happened to be a perfect fit for my bottom border and so it received a quick clip with the Scallop Edge Punch.
  • Rich Razzleberry Grosgrain 'hides' the seam were the two papers meet. (Also reversible - polka-dots adorn the opposite side.)
  • My main panel is Watercolor Paper. Using my Stamp-a-ma-jig I stamped three dress forms in StazOn ink. Then, I whipped out my Blender Pens and Creamy Caramel ink to quickly shade the pedestals.
  • The dress form image is stamped again onto Rich Razzleberry and Melon Mambo Patterns Designer Series papers. The form is trimmed and popped using Stampin' Dimensionals.
  • Today's sassy something: beads. I used my 2-Way Glue Pen to apply a thin line of glue and then grabbed my Paper-Piercing Tool to pick up the beads and apply them. (Please note there are no buttons on today's creation - such restraint! ;)
  • The image panel is layered with Crushed Curry and popped onto a 3.25" square of Rich Razzleberry. Two ribbon 'tabs' adorn the right corner.
  • I ran my Birds and Blooms Sizzlits through the Big Shot to create a layered flower. A few sparkly beads seemed like the perfect embellishment to dress up my bloom's center. In addition, I created leaves by looping Crushed Curry Grosgrain and slipping them under the bloom with Mini Glue Dots. (my constant go-to for adhering items other than paper)
  • Lastly, a 'fitting' sentiment. I isolated the first part of the sentiment, "It seems only fitting..." by coloring directly onto the stamp with my Rich Razzleberry Stampin' Write Marker. The remaining portion of the sentiment is on the inside of the card, "...to wish you a happy day".
  • We'll be wrapping up the Purple Series soon - a few more projects and a beautiful way to display them are coming your way... stay tuned!

I hope you'll join me at Pals Paper Arts this week and participate in our Simple Sketch Challenge. Remember: You are welcome to use any brand of products. If you find yourself pining for some NEW stamps and sassy supplies:


Stamps: Chic Boutique (113744)
Paper: Rich Razzleberry (115316), Melon Mambo (115320), Crushed Curry (115319), Razzleberry Lemonade Designer Series (115675)
Ink: StazOn (101406), Creamy Caramel (103220), Blender Pens (102845), RichRazzleberry Stampin' Write Marker (116329)
Tools: Scallop Edge Punch (112091), Birds and Blooms Sizzlits - 4 pack (113485)
Must-Haves: Stamp-a-ma-jig (101049), 2-Way Glue Pen (100425), Paper-Piercing Tool (116631), Mini Glue Dots (103683), Stampin' Dimensionals (104430)
Sassy Somethings: Bead Duo - Red (110731) Polka Dot-Grosgrain: Rich Razzleberry,(115613) Melon Mambo (115611), Crushed Curry (115614)


Tuesday, August 4

Purple's Got Mojo

These are a few of my favorite things: damask, flowers, and buttons... this card has them all! Plus this purple card has mojo - Mojo 98 to be exact. It's also part of my Purple Series.

My Perfect Plum card base is cut 7" x 10" and scored in half. Using the damask image from Friends 24-7 I stamped in Perfect Plum onto Pale Plum card stock to create my own background paper. HINT: The Holiday Mini (debuting September 1st) includes Designer Series Paper with a fabulous damask design.
  • I stamped the entire sheet of card stock using my Stamp-a-ma-jig and then trimmed a 5.5" x 4.75" section. I mounted this onto a So Saffron matte.
  • A 3.5" square was cut from Plum Perfect and zipped through my Big Shot using the Venetian Lace Cuttlebug embossing folder. TIP: Texturz Impressions Pads ensure a deep impression and perfect result.
  • My Circle Scissor Plus is the perfect tool for creating circles. I layered it with the scalloped circle from the Scallop #2 Bigz Die. The So Saffron print is from the (retired) Walk in the Park Designer Series Paper collection.
  • A Rose is A Rose was still sitting in my stamping area from PPA1 at Pals Paper Arts. TIP: Didn't have time to play last week? Tomorrow, Thursday, August 6th, a brand new challenge will be posted - A Simple Sketch. I hope you can play along!
  • The base color of my rose was stamped in Pale Plum -- the accent color is Perfect Plum. (Can you say all these purple colors 3 times fast?) The leaves are inked in Mellow Moss. I always stamp two of the large roses and then cut one down to layer and add extra dimension. Stampin' Dimensionals are this girl's best friend!
  • For a little bit of bling pearl stick-ons were added. To tie everything up: So Saffron Grosgrain, complete with a Button Latte middle. TIP: During the month of August you can earn FREE buttons with any $35 or more purchase in stamps from the Growing Up section of the catalog. Click here for more details.
  • Today's sassy something: my sentiment. I used the (retired) Tags So Much set to quickly add a sweet sentiment. TIP: All you need for your own sassy sentiment is a Tag Punch. (available in small or large)

Stamps: A Rose Is A Rose (111560), Friends 24-7 (113218), Tags So Much (retired)
Paper: Perfect Plum (101889), Pale Plum (101658), So Saffron (105118), Mellow Moss (102898), Walk in the Park Designer Series (retired)
Ink: Perfect Plum (101437), Pale Plum (102732), Mellow Moss (102774)
Tools: Tag Punch (small: 108264; large: 105934), Big Shot (113439), Texturz Impressions Pads (114614), Stamp-a-ma-jig (101049), Circle Scissor Plus (112530), Scallop Circle #2 Bigz Die (113469), Cuttlebug Venetian Lace embossing folder
Must Haves: Stampin' Dimensionals (104430)
Sassy Somethings: So Saffron Grosgrain - currently available in 1/2" stripe (113699), Button Latte (114333), Pearl stickers (not SU)